
We moved into our house 6 months ago and I feel like this was our first big decorating project. Our house is new so no work needed to be done to the house itself, we just get to do the fun part of making it home-y.

First, I did a ton of research! Pinterest was definitely my friend here. I had no idea what kind of pieces I wanted for the wall or what size to make them and how to arrange them. I poured over hundreds of examples looking for inspiration.
Once I kind of had an idea of what I wanted, I opened a slide in Powerpoint to make a mockup of my wall. You can use any program to do this where you can freely move around images and resize them.
I learned from my research to pick a focal point and then work around that. I decided which ones I wanted to be my "big" photos and then adjusted sizes based on what fit. At this point, I had no idea what the actual photo printing dimensions I wanted, just each of the pictures in relation to one another.
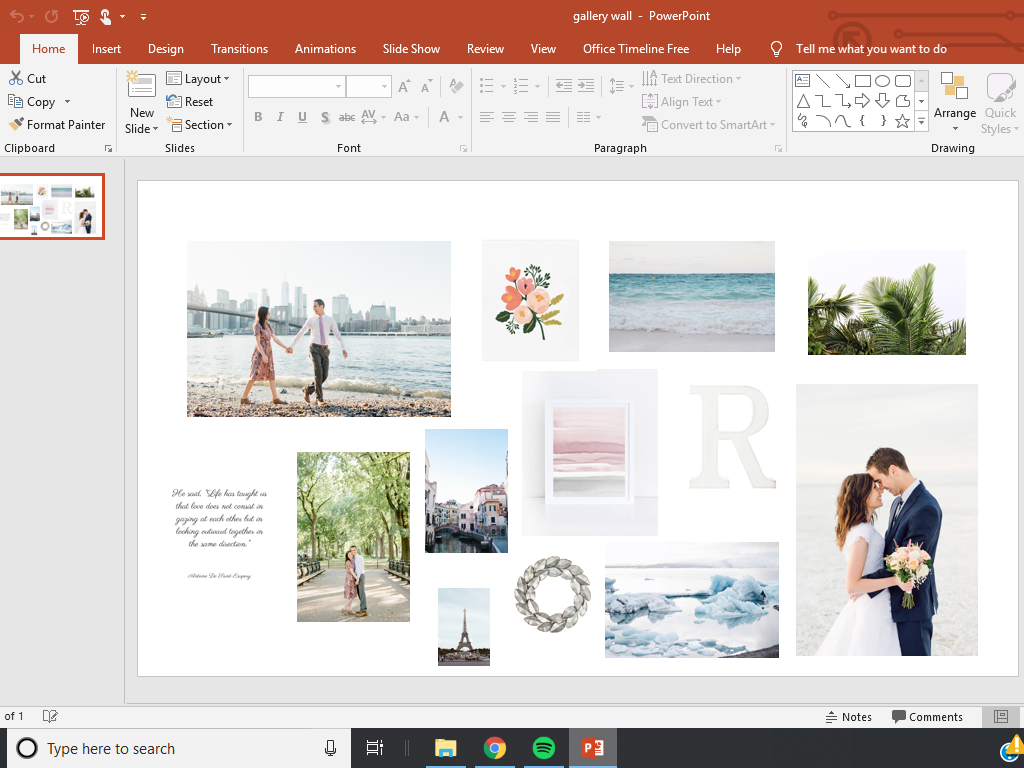
I also had to think about the feel of the wall. I knew I wanted it to be bright and embrace the things that are important to us! That came down to engagement and bridal photos, travel, and the ocean. Another thing to think about is texture! Do you want different shapes? Or some things sticking out? All they all pictures or do you want to add other objects?
As you can see, I made some changes from this layout to the real thing, but it was a great place to just get my ideas out there!
The next thing I did was decide on photo dimensions. I ordered mine from Costco because they are a great price for great quality! I took the dimensions that they had available (normal sizes) and made sure that there were frames to match those sizes!

I got most of my frames from IKEA. They also have great prices. The rest I got from Michael's on sale for buy one, get one free! I have serious commitment issues when it comes to spending money so this was perfect because I felt like I was getting a good deal. I highly recommend looking for sales because frames can be so expensive!
Once I had all the pictures in the frames, I laid them out just to see how I liked it! I realized that the spacing I had on my mockup didn't exactly fit with the layout in real life so I took out a couple things. I also switched one of the pictures.

When it was time to hang it up, I did some serious measuring. The easiest thing for me was to add up the dimensions (in inches) of the length and width of my entire layout. This includes the frames because they add a couple extra inches AND DON'T FORGET to add space in between your pictures!! I did 3 inches in between each.
After I measured the length and width of my layout, I measured the length and width of the wall. You can decide where you want it to fall on your wall! I did mine centered between the floor and the ceiling, but I definitely contemplated doing it between the baseboard and the ceiling so it was a little bit higher. It's totally personal preference!

I had my corner marks, we hung the corners first, and then filled everything in from there. We used command strips which I highly recommend so you don't have to nail holes in your wall! And when taken off properly, they are super easy to work with and can hold a lot of weight!

We absolutely love this new addition to our house! I've linked all the things we used below.
IKEA frames 16x20
IKEA frame 8x10
IKEA frame 9x9
Michael's frames 11x14
Hobby Lobby - monogram R
Command strips
Rifle Paper Co - flower print
Mary Jessica Photography - bridals and engagements
McKenzie Blackner - Iceland, Eiffel Tower, ocean
Claire Lewis - Blue Mosque
Bryan took the photo of Neuschwanstein Castle
I designed the quote on Canva. I may do a tutorial on this later! It's the same program I use to do all my quotes for my book reviews each month.
First, I did a ton of research! Pinterest was definitely my friend here. I had no idea what kind of pieces I wanted for the wall or what size to make them and how to arrange them. I poured over hundreds of examples looking for inspiration.
Once I kind of had an idea of what I wanted, I opened a slide in Powerpoint to make a mockup of my wall. You can use any program to do this where you can freely move around images and resize them.
I learned from my research to pick a focal point and then work around that. I decided which ones I wanted to be my "big" photos and then adjusted sizes based on what fit. At this point, I had no idea what the actual photo printing dimensions I wanted, just each of the pictures in relation to one another.
I also had to think about the feel of the wall. I knew I wanted it to be bright and embrace the things that are important to us! That came down to engagement and bridal photos, travel, and the ocean. Another thing to think about is texture! Do you want different shapes? Or some things sticking out? All they all pictures or do you want to add other objects?
As you can see, I made some changes from this layout to the real thing, but it was a great place to just get my ideas out there!
The next thing I did was decide on photo dimensions. I ordered mine from Costco because they are a great price for great quality! I took the dimensions that they had available (normal sizes) and made sure that there were frames to match those sizes!
I got most of my frames from IKEA. They also have great prices. The rest I got from Michael's on sale for buy one, get one free! I have serious commitment issues when it comes to spending money so this was perfect because I felt like I was getting a good deal. I highly recommend looking for sales because frames can be so expensive!
Once I had all the pictures in the frames, I laid them out just to see how I liked it! I realized that the spacing I had on my mockup didn't exactly fit with the layout in real life so I took out a couple things. I also switched one of the pictures.
When it was time to hang it up, I did some serious measuring. The easiest thing for me was to add up the dimensions (in inches) of the length and width of my entire layout. This includes the frames because they add a couple extra inches AND DON'T FORGET to add space in between your pictures!! I did 3 inches in between each.
After I measured the length and width of my layout, I measured the length and width of the wall. You can decide where you want it to fall on your wall! I did mine centered between the floor and the ceiling, but I definitely contemplated doing it between the baseboard and the ceiling so it was a little bit higher. It's totally personal preference!
I had my corner marks, we hung the corners first, and then filled everything in from there. We used command strips which I highly recommend so you don't have to nail holes in your wall! And when taken off properly, they are super easy to work with and can hold a lot of weight!
We absolutely love this new addition to our house! I've linked all the things we used below.
IKEA frames 16x20
IKEA frame 8x10
IKEA frame 9x9
Michael's frames 11x14
Hobby Lobby - monogram R
Command strips
Rifle Paper Co - flower print
Mary Jessica Photography - bridals and engagements
McKenzie Blackner - Iceland, Eiffel Tower, ocean
Claire Lewis - Blue Mosque
Bryan took the photo of Neuschwanstein Castle
I designed the quote on Canva. I may do a tutorial on this later! It's the same program I use to do all my quotes for my book reviews each month.


Be First to Post Comment !
Post a Comment